How to Bypass Automatic Repair on Windows 10 If you need to bypass the Automatic Repair feature of Windows 10, you can disable it using Command Prompt; this is especially helpful if your PC is stuck in an infinite loop of repairs. The following steps can help you do that: 1. Open Command Prompt : First, you need to boot your computer until you access the recovery environment. This will require you to interrupt the boot process three times, thus causing Windows Recovery Environment to open every time you do this. After that, go to Troubleshoot >
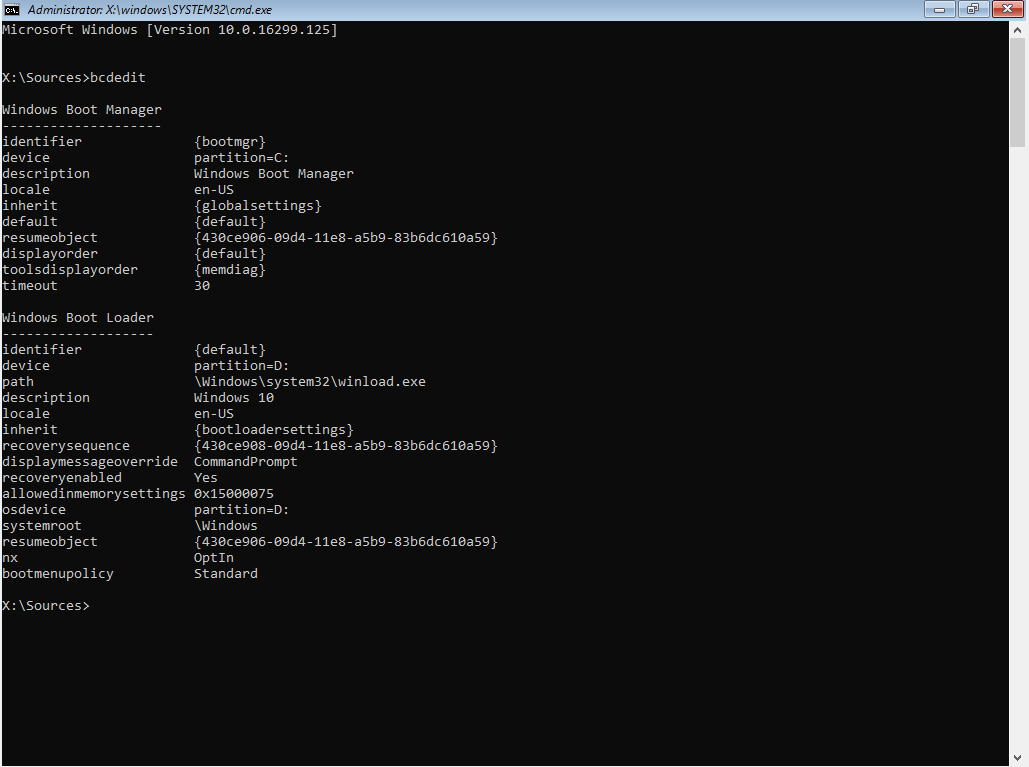
Advanced options > Command Prompt. 2.Automatic Repair (ad) Check the Current Settings : While in Command Prompt, type bcdedit and press Enter. This will display the current Boot Configuration Data settings, showing you the configuration of the boot process and indicating if whether automatic repair is turned on or not. 3. Turn the Power Off : To disable automatic repair, type the following command into Command Prompt as presented below: bcdedit /set {default} recoveryenabled No If successful, you will see a message that says that the operation completed successfully. 4. Restart your PC and re-enable if necessary : Type exit in Command Prompt after this command is done and select Continue to restart your PC. Automatic Startup should now be turned off, allowing you to access your Windows 10 normally. In the future, if you feel that you need to enable automatic repair, you can go back to this section and use the same command as above, only replacing No with Yes. This can be helpful to users who experience persistent boot issues or simply prefer to troubleshoot problems themselves. Disabling this feature is a bit risky because it may prevent automatic recovery from future issues or crashes.

