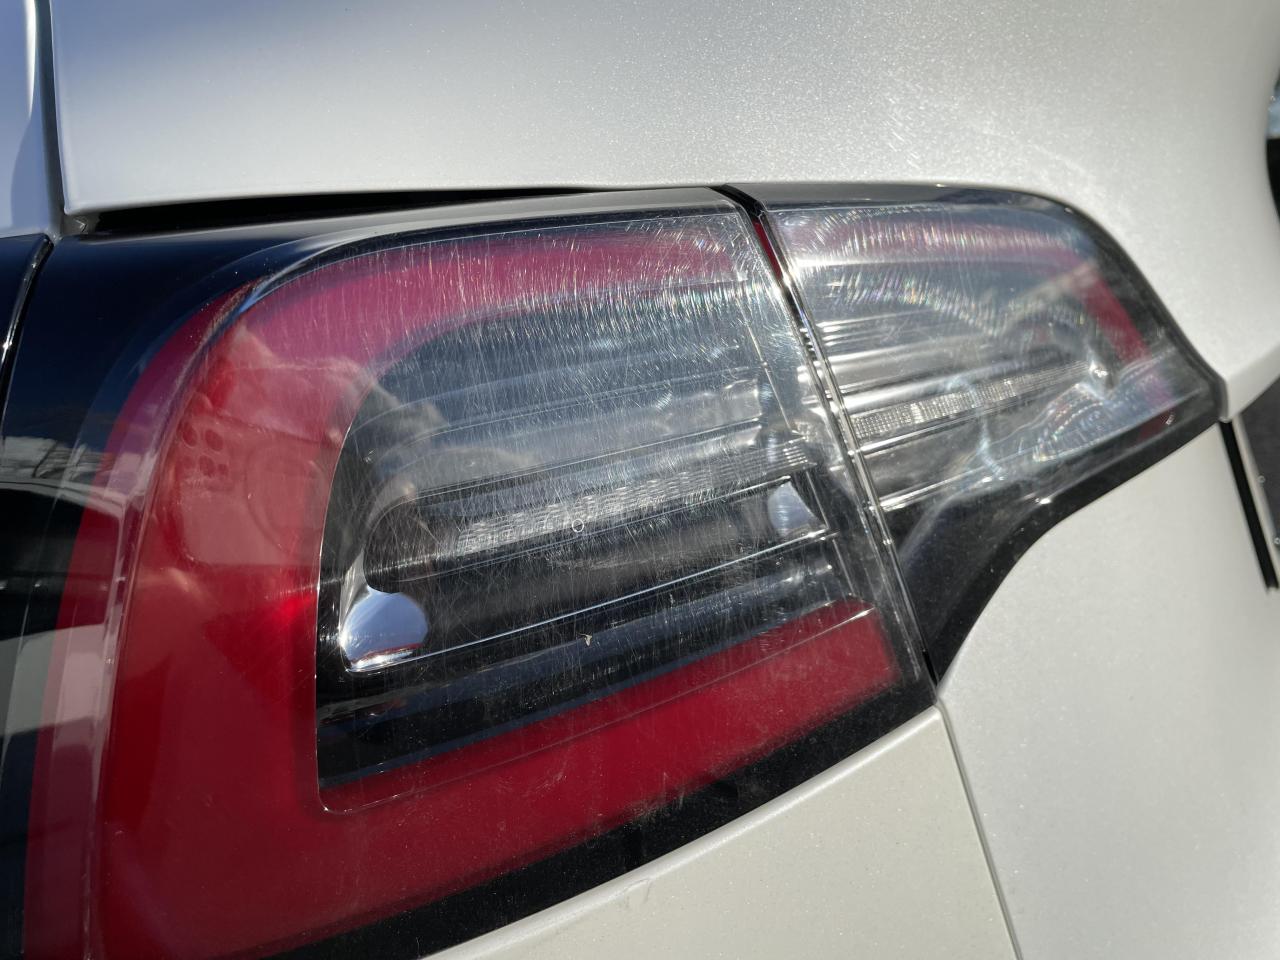
Guide To Buffing Tail Light Scratches Yourself
Scratched tail lights can be corrected with tools and materials you likely already own, as a part of an easy DIY project at home! Read on to learn how combines in short abrasive use with sanding talc and buffers assist greatly if you hardness scratches both from previous life jig tail lights.
Preparation
Step 1 — Start by using soap and water to get the lenses of your tail lights as clean as possible. Step 2 of My Detailing Flow Chart Use a clay bar to get rid of any bonded contaminants from the surface. This will basically create the final smooth base for you to polish.
Buffing Process
Use a medium-cut polishing compound (ad)(ad) and foam cutting pad on a dual-action polisher. Work small sections, medium-heavy pressure and overlap passes. If you have deeper surface scratches, then start on a heavier compound.
It is also important after the first time to check out a flashlight and see if it needs to be done again. MENZERNA 400 ULTRA GRANITE CUT POLISH: Once you have removed the scratches but not necessarily polished to perfection, change to a fine compound and with a softer pad start refining your paint.
Hand Polishing Alternative
If you do not have a machine polisher, hand polishing can be done in the same way. Apply the polishing compound with circular motion, using a microfiber applicator pad. This method, however may take longer and require more effort but could still be effective.
Finishing Touches
Clean the tail light with isopropyl alcohol towelette after sanding. Protect the polished area with a good plastic sealant or ceramic coating to preserve its clarity and stop it from fogging up for longer.…) And keep in mind to work gently along the edges of a tail light and if necessary use masking tape to protect surrounding paint. Very nice result at home will get you patience and a layer with an eye for details.