Gelcoat Scratch Repair: Step by step
Assessing the Damage
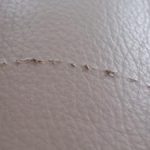
Inspect the damageThe first thing to do before fixing your phone is making an evaluation of how bad and deep the scratched area, you can identify it by a thin white line on color display. It only takes surface scratches to go right through the gelcoat quite quickly and it is normal for them little paint jobs must be constantly made, while any dings larger than just very minor ones call ultimately as an algae removers. Brittle fiberglass will show deeper scratches or gouges in the surface and they need to be filled with gelcoat paste.
Preparing the Area
For deeper scratches:
1. Scrub the area clean with soapy water, and then wipe it down using acetone 2. Make the scratch into a V-shape 3 with sandpaper. When dry, sand with fine-grit sandpaper to feather the edges of the scratch 4. Tape the adjacent area to put a mask
Applying Gelcoat Filler
Mix up some gelcoat paste according to the manufacturers directions . Use a plastic spreader to work the paste in overfilling somewhat. Get leveling compound jewel with plastic central and leave it to harden fully.
Sanding and Finishing
Sand the repaired finish smooth with 400-, then 600-, and finally, apply a final coat of clear lacquer. Polish the repair with rubbing metall and apply a topcoat of stainless wax to preserve our patchwork.